How To
How to Do a Strand Test At Home?
If you are thinking of giving a new lease of life to your hair with the awesome new box dye colour then you are required to know about the process of how to do a strand test at home. Your hairdresser will do one of these tests at the time of testing a new colour. Here in this article, we are going to share everything that you need to know about why you need to do this and also about how to ensure that it is easy and mess-free.
What is a Strand Test?
A strand test mainly involves the dyeing of a small amount of hair that is out of sight to simply test the colour of the hair. We all know that it is always tempting to skip the test and if you are really excited about the new colour then you may not be willing to wait for a second to get the latest hue.
How To Do A Strand Test Step-by-Step?
Here we are going to share a step-by-step guide that helps you to do a strand test in a simple and easy manner.
Step 1: Prepare Your Hair
You are required to prepare your hair for the hair dyeing. Simply use your clarifying shampoo to wash the hair and simply clean it by using any of the products or impurities that will mess up with the hair dye results. Then, dry your hair without styling or using any of the styling products before you move to the next step.
Step 2: Mix Up Your Hair Dye
Even if we are only dyeing a small part of the hair, you are required to mix up the complete bottle to simply ensure that you have the correct solution of colour. Ensure that you cover your surfaces and also your clothes and also prepare to dye as well.
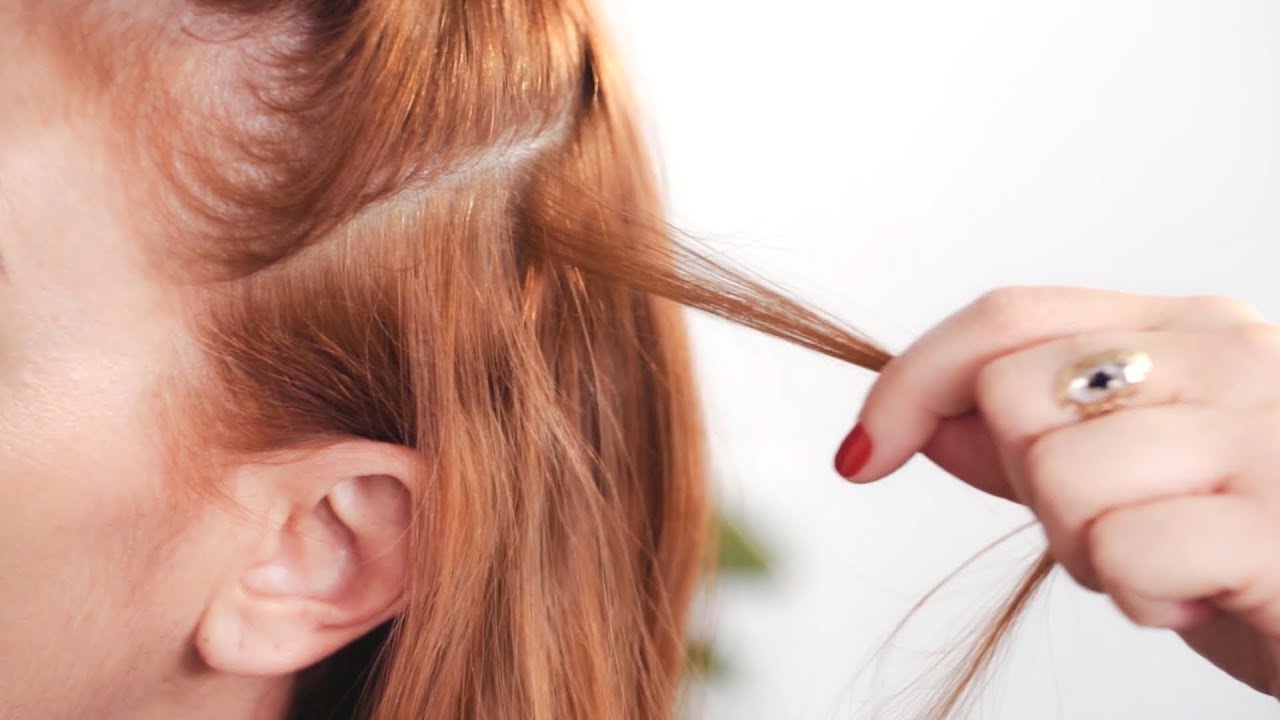
Step 3: Locate Your Strand
Now, it is called a strand test but you are not going to get as much of the results if you will dye only one strand of your hair. You are required to take a strip nearly an inch wide from the inconspicuous area and then simply section it off from the rest. Now, the best place is the name of your next.
You can simply use a clip or any of the elastic to simply get the rest of your hair out of the way. Hair dye mainly deposits the colour when you apply it and you need to ensure that your strand is safely away from the remaining hair.
Step 4: Dye It!
Simply paint the dye on your strand from the root to the tip. Ensure that it is saturated properly so that the dye will sink well. In terms of keeping your test away from the remaining hair. You can be able to use a tip foil to simply wrap around it. The head from the foil will help the colour to develop in a quick manner. Simply leave the hair dye or bleach for as long as given in the instructions on the box.
Step 5: Wash and Review
When the time of the development gets completed you have to rinse your hair and then dry it properly to see the complete effects of the color.
Also Read:
Final Verdict
So, these are all the basic details and steps that help you to know the process of how to do a strand test at home. We hope that this article becomes useful and helpful for you and helps you to know the complete details. If this article is useful for you then do share this article with others so that they can be able to take the benefits from this article.
-

 Expert Advice2 years ago
Can Albinos Dye Their Hair – Let’s Find Out
-

 Expert Advice2 years ago
How to Tone Down Hair Color That is Too Bright? – 8 Super Simple Ways
-

 Expert Advice2 years ago
T Bar Highlights
-

 How To2 years ago
Chocolate Cherry Hair Color – How to Get Exact Shade?
-

 Expert Advice2 years ago
Why Do Salons Wash Your Hair After Coloring?
-

 Expert Advice2 years ago
Can You Dye Synthetic Hair With Semi Permanent? Let’s Find Out
-

 Hair Styles12 months ago
Wash and Wear Haircuts for Over 60
-

 Expert Advice2 years ago
Half Green Half Black Hair – Methods to Get This Look